Mastering the Art of Fall Layered Paper Cut: A Complete Guide to 3D Autumn Digital Designs
The transition from summer to autumn is not just a change in weather; it is a shift in creative energy. For crafters, designers, and DIY enthusiasts, this season brings with it a unique opportunity to explore depth, texture, and warmth through paper crafting. Among the most popular trends in recent years has been the Fall Layered Paper Cut 3D Autumn design. This technique transforms flat digital files into stunning three-dimensional artworks that capture the essence of the harvest season.
Whether you are looking to create elegant minimalist decor or vibrant, colorful displays for Thanksgiving, understanding how to utilize these digital assets is essential. This guide will walk you through everything you need to know about working with layered SVG and DXF files, from file preparation to advanced lighting techniques.
Understanding the Design: What is a Layered Paper Cut?
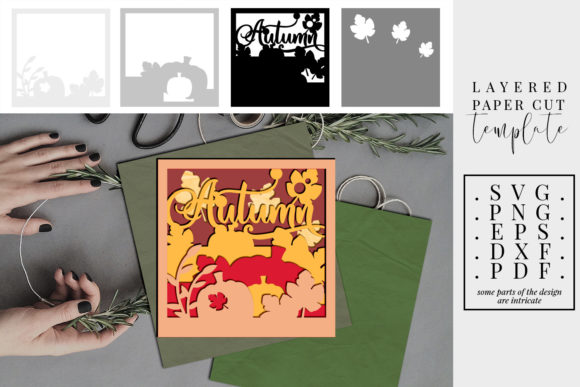
At its core, a layered paper cut design involves stacking multiple layers of material—typically cardstock, vinyl, or foam—to create a sense of depth. Unlike traditional single-layer silhouettes, a 4 layered design allows for intricate details to shine through without overwhelming the viewer. The specific design in question features classic autumn motifs, including pumpkins and leaves, arranged in a composition that is approximately 18cm x 18cm.
The beauty of this approach lies in its versatility. You are not limited to one aesthetic. By choosing different shades of a single color, you can achieve an elegant minimalist design that fits seamlessly into modern home decor. Alternatively, using different hues across the four layers can result in a colorful end result that pops with seasonal vibrancy. This flexibility makes the design suitable for a wide range of projects, from wall art to greeting cards.
The Importance of Scale and Proportion
When working with vector designs, scale is critical. The standard size for this particular file set is 18cm by 18cm. However, the beauty of digital vector formats like SVG (Scalable Vector Graphics) and DXF (Drawing Exchange Format) is their ability to be resized without losing quality. While you can enlarge the design for large-scale installations, there is a lower limit to consider.
Important Note: It is generally not recommended to make the design smaller than 14cm x 14cm. Because some parts of the design are intricate, reducing the size too much can result in tiny pieces that are difficult to cut accurately or assemble properly. Maintaining a minimum size ensures that the delicate details of the pumpkin and leaf patterns remain visible and structurally sound.
Technical Specifications: Files and Formats
Before you begin your crafting journey, it is crucial to understand what you are receiving. This listing provides a comprehensive package of digital files designed to work with various software and cutting machines. Understanding these formats will help you avoid compatibility issues and ensure a smooth crafting experience.
What You Will Receive
The download comes as a compressed ZIP file. To access the contents, you will need an unzipping tool such as WinZip, WinRAR, or the built-in extraction feature found in most operating systems. Once extracted, you will find several key file types:
- SVG Files: These are ideal for use with Cricut Design Space, Silhouette Studio, and other vector-based design software. The listing includes an SVG with all 4 layers grouped together in gray shades, which helps visualize the final stacked look. Additionally, there is a separate SVG for each layer in all black, allowing for precise editing if needed.
- DXF Files: These are widely compatible with laser cutters and older versions of cutting software. They provide a robust format for industrial or semi-industrial production.
- EPS Files: Encapsulated PostScript files are excellent for professional graphic design software like Adobe Illustrator, offering high-quality vector data for print-ready materials.
- PDF and PNG Files: These raster and document formats serve as visual references and can be used for printing templates or viewing the design on devices that do not support vector editing.
Software Compatibility Check
One of the most common pitfalls for beginners is assuming that all files work with all machines. Before downloading, please verify that at least one of the included file formats is compatible with your machine’s software. For instance, if you are using a basic laser cutter that only accepts DXF, ensure you have the appropriate plugins or converters ready. If you are using a consumer-grade electronic cutter like a Cricut, the SVG files will offer the best user experience.
Crafting Techniques: From Flat to 3D
Once you have your files prepared and your materials selected, the real magic happens during assembly. The goal is to move beyond a flat image and create a tangible object with depth.
Material Selection
The choice of material significantly impacts the final look. For a shadow lightbox effect, translucent materials like vellum or colored acetate work beautifully. For a more traditional paper craft look, heavy-weight cardstock in matte finishes is recommended. Consider using different textures; for example, a textured gold paper for the pumpkin layer against a smooth cream background can add tactile interest.
Using Spacers for Depth
To achieve true 3D effect, you cannot simply stack the paper layers directly on top of each other. You must introduce spacers. Common tools include:
- Foam Pads: Self-adhesive foam dots are easy to apply and provide consistent spacing between layers.
- Double-Sided Foam Tape: This allows for larger surface areas to be elevated, ensuring stability for heavier designs.
- Cardboard Strips: For larger projects, strips of cardboard can be cut to size and glued between layers to create a sturdy frame.
By placing spacers between each of the four layers, you create a shadow gap. When light hits the design, these gaps cast subtle shadows, enhancing the perception of depth and making the pumpkin and leaf motifs appear to float.
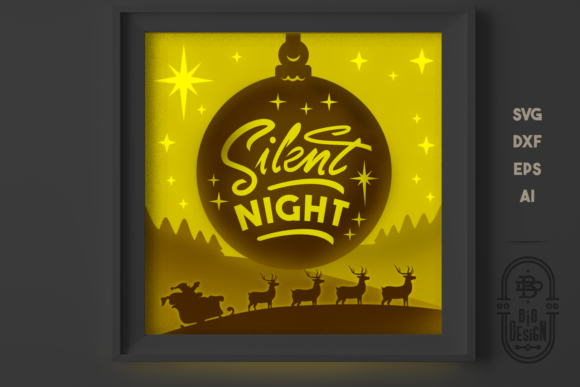
Advanced Application: The Shadow Lightbox Effect
One of the most impressive ways to use the Fall Layered Paper Cut 3D Autumn design is by incorporating it into a shadow box or lightbox. This technique elevates the craft from simple decoration to ambient lighting.
To create a lightbox, place your layered paper cut inside a deep-frame shadow box. Position an LED tea light or a small battery-operated strip light behind the back layer. As the light passes through the semi-transparent layers, it illuminates the colors from within, creating a warm, glowing effect that is perfect for Thanksgiving table settings or Halloween decor. The intricate details of the leaves and pumpkins become silhouettes of light, casting beautiful patterns on surrounding walls.
Common Misunderstandings and Tips for Success
Even experienced crafters can encounter challenges with digital files. Here are a few tips to ensure success:
- Complexity Warning: Some parts of the design are intricate. When cutting, ensure your blade is sharp and your mat is sticky enough to hold small pieces. For laser cutters, adjust the power and speed settings to prevent burning delicate edges.
- Grouping vs. Ungrouping: The provided SVGs may have layers grouped. If you need to resize individual elements independently, you will need to ungroup them in your software first.
- No Physical Item: Remember, this listing contains only digital files. No physical items will be shipped. Ensure you have the necessary equipment to cut and assemble the design yourself.
Conclusion
The Fall Layered Paper Cut 3D Autumn design offers a versatile and engaging way to celebrate the season. Whether you are drawn to the minimalist elegance of monochromatic shading or the joyous explosion of multi-hued colors, this digital asset provides the foundation for endless creativity. By understanding the technical requirements, respecting the scale limitations, and mastering the use of spacers, you can transform simple digital lines into breathtaking 3D art.
As you embark on your crafting project, remember that precision and patience are key. Take your time with the assembly, experiment with different lighting setups, and enjoy the process of bringing this autumnal masterpiece to life. With the right tools and a bit of inspiration, your home or workspace will be adorned with a truly unique seasonal display.